Search This Blog

Saturday, June 18, 2011

Making a Rolled Hem…without a sergeror a rolled hem foot

This one is for Amy. She’s a novice and I encouraged her to take the plunge and give it a try. So, she made a list of everything she needed to make a couple of Twirl Skirts for her adorable little girls. She placed a few orders online for fabric and elastic, along with a rolled hem foot. We made a few adjustments to the pattern/tutorial so that she could make a longer skirt and traded a couple million emails back and forth. Tragically, the elastic arrived in the wrong size, so we had to make a few more adjustments. Expectantly, her rolled hem foot was in transit somewhere between China and Uranus. So, I told her to try a zigzag stitch to finish the hem.
I tell you this little bit because often times it isn’t the actual sewing that becomes the challenge, but rather the logistics. Fortunately, once you get that matter sorted out, and read your machine manual, everything else seems to fall into place quite easily.

Once again, I will recommend The Dressmaker’s Technique Bible by Lorna Knight for all sewers, novice and pro, alike.

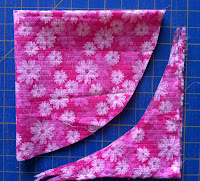
Now, if you ever find yourself creating a garment from a circle, like the Twirl Skirt found in my Etsy shop, you will be begging for a way to finish the hem without an iron. The easiest way is to roll the hem using a serger. If you don’t have a serger, you can check and see if your machine has a rolled hem foot or if there is a suitable one for sale on the market. You may also try using a zigzag stitch to finish the hem.
So, follow along with the photos as you read through the steps. I hope you enjoy this one, I’m sure many folks out there will find it very handy!


1)You have a piece of fabric that needs a fast and easy finished edge that resembles a rolled hem.
2)Select a zigzag stitch on your machine and set your stitch length one notch above zero and your stitch width to its widest setting. Mine happens to be 0.5 and 6.0. You can choose a different length and width; this is just a good starting point.
3)Place the fabric in you machine so that when you sew, the stitch falls just off the edge of the fabric.
4)Run your stitch down the fabric. You may need to encourage the feed slightly.
5)If you would like you may run the stitch a second time to get a more uniform and secure finish.
6)This is what my fabric looked like after the second round of zigzagin’.
7)This is the rolled hem of my skirt, done with a serger, just so that you may compare.

Thursday, June 16, 2011

Machine Shirring Tenderfeet Style


This is such a fun and easy technique that too many people find initially intimidating. Take heart, the web is full of how-to tips, free, affordable and adorable tutorials, videos and information. I have read a great deal on the subject and applied it time and time again. So, I decided to compiled the included information for my followers, in particular Pamela ;). Enjoy, and feel free to add your own tips and information in the comments section.

It’s as simple as this...


What you need:
Your sewing machine
Regular machine sewing thread
Elastic thread (you can usually find this in the elastic section of your craft store)
An empty bobbin
Fabric


A few things to consider:
Every machine and every person sews differently. You will likely need to spend some time practicing on scrap fabric until you find that sweet spot. Different weaves and weights of fabric gather differently. A satin fabric will gather more readily than a denim. When considering how wide your fabric should be, a simple rule to follow is 1.5 to 2 times wider than the desired width of your completed project.

So here we go and remember, it’s easy!

1) Begin by loosely hand spooling the elastic thread onto your bobbin. Be sure you go in the same direction that your machine does when it spools the bobbin automatically. Also, take care not to stretch the thread.
Some have had better success letting the machine spool the thread, possibly because it adds just a little bit of tension. I have tried this and seen little difference. To do this, I began by spinning a little bit of elastic thread onto the bobbin. Then, I placed it onto my machine, just as I would when spooling regular thread. I held the elastic in my hand and began spooling; taking care not to put too much tension on the elastic.

2) Load the bobbin into your machine as you normally would when you’re about to sew.

3) Set your straight stitch length to its longest setting.
Some have had success with a normal stitch length and still others, somewhere in between. This is where you have to play around with your machine a bit to find that sweet spot. Adjust your stitch length and tension until you gain the desired results.
For me, I set my machine to a standard straight stitch and adjust my length to a 6.0.

4) Starting at one end of your fabric, run a stitch down the width to the other end. Make certain you backstitch several times at the beginning and end of your shirring stitches. Also, do not pull your fabric through the feed. You don’t want to stretch the elastic thread. I will admit that I do, at times, encourage my fabric through the feed. The important thing to consider is if you put too much tension on your elastic thread, it may break with use.
Some prefer to knot the thread tails by hand, instead of backstitching.

5) Add as many rows of shirring stitches as needed to achieve the desired results. The distance between each stitch row can vary, depending on your project. The closer your rows and the more you add, the more your fabric will be drawn in. If you have many rows close together, you may begin to lose your stretch. So, the size of your project is directly proportional to the distance between each row!

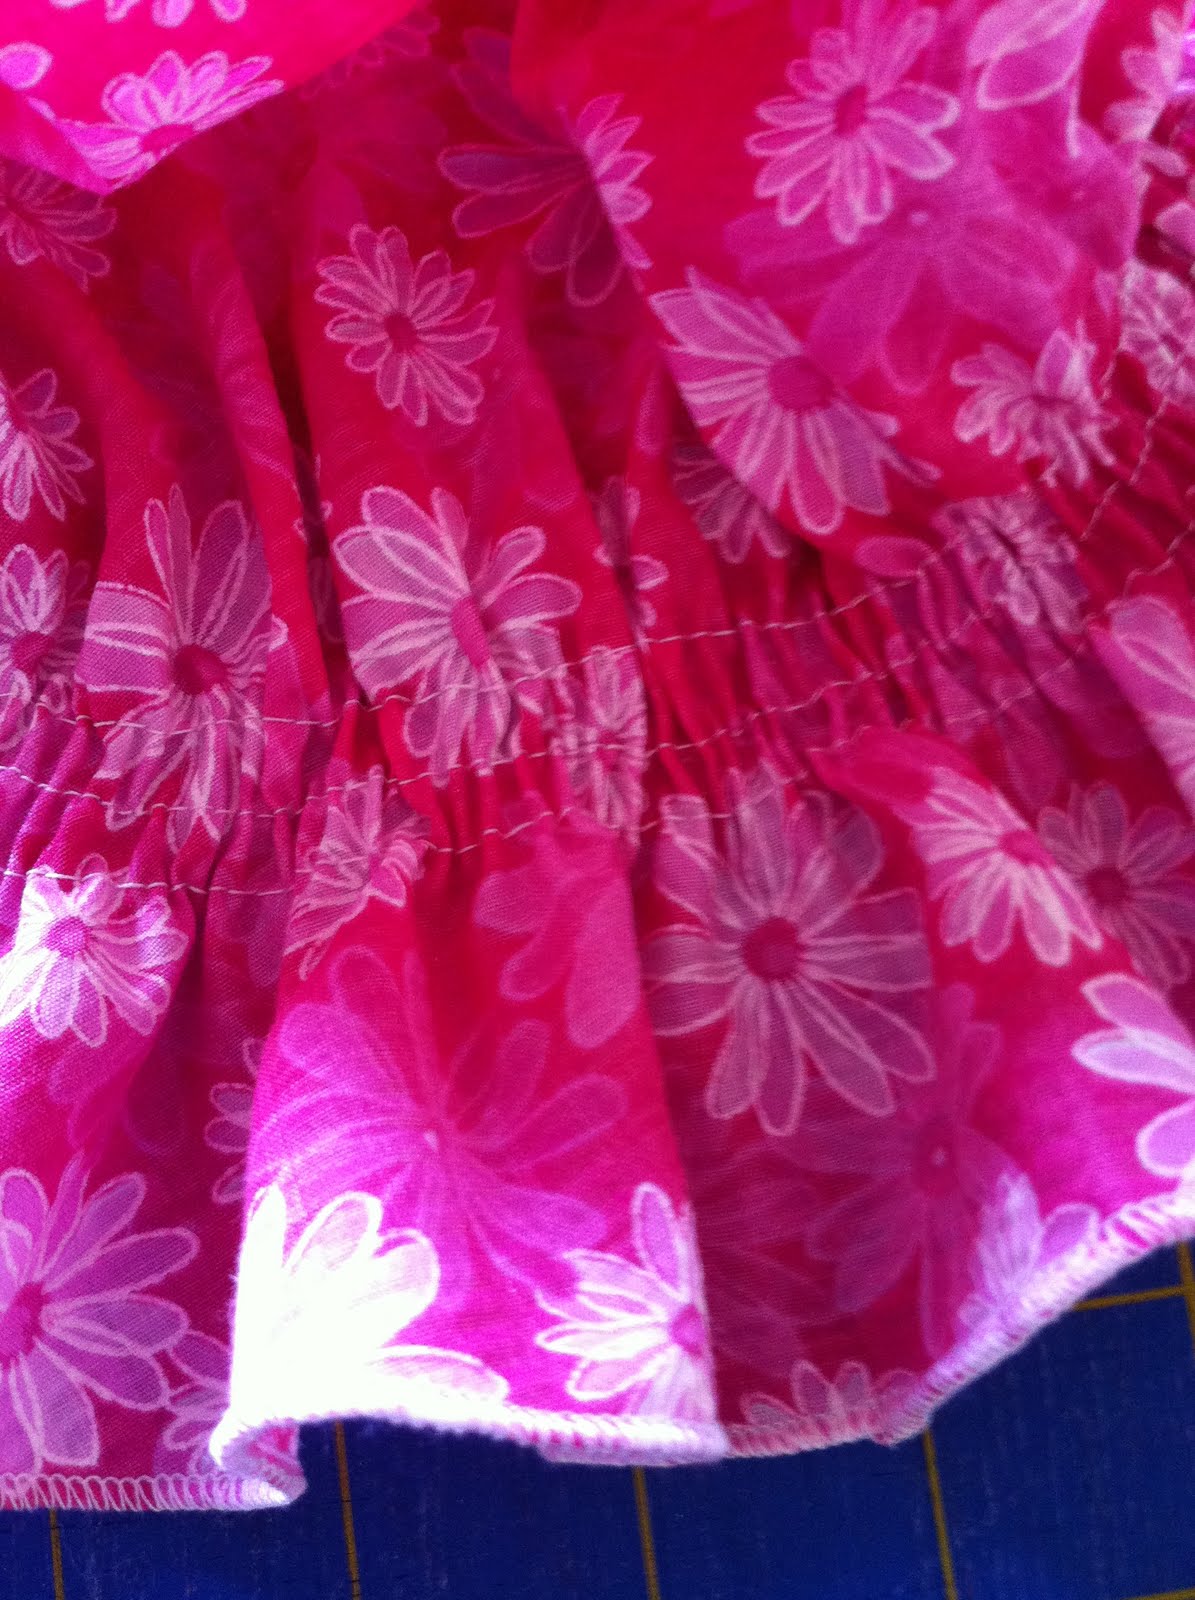
6) Place your project on the ironing board and hold your iron over the elastic, not touching, and let loose on the steam button. This will make it shrink up, giving you more ruffle and stretch. The same effect will be achieved in the dryer, the first time you launder. So, if your project doesn’t seem to have gathered quite enough, add a little heat and watch it retract a bit more.

For a simple project to hone your skills give my free sun hat tutorial a try. If you think you’re ready to move on to something a bit more entailed, search the web for free dress tutorials or check out my Etsy shop. I offer several adorable and easy to make patterns at affordable prices.

Saturday, June 4, 2011

The Name Game

Well, in light of several current events, I am moving the name game for my upcoming tutorial onto this blog. I have selected many of my favorite suggestions and just ask that you comment below with your favorite(s). You may choose up to three names. If you are having trouble commenting, simply email your choices to Tenderfeetstitches@gmail.com. The winning name will become the name of the pictured dress and the contributor will receive the completed tutorial free of charge. Thanks so much for helping me decide and following me to my blog. Voting will close when I finish writing the tutorial, within the next week.


Please choose no more than three (3) names.


Mandy Carey Sweet Sassafras
Leah Curran Picnic in the Park
Courtney White Martin Sweetheart Dress/Top
Abbie Simpelo-Dyer Tallulah
Little Tickle Boutique Bella Rose
Pamela Bell The Meadow Brooke
MaukyJo Shoulder Tie Apron Dress/Top
Jheri Jordan Heart of Dixie
Jheri Jordan Shabumpkin Summer Dress/Top
Micheline Nadeau Fairbank Little House on the Prarie Summer Dress
Amber Wirth Mommy's Little Helper

Votes via email

Mommys little helper
Little house on the prairie
The Meadow Brooke

Wednesday, June 1, 2011

Finishing Your Seams! Without a Serger…

This is part 2 of many posts containing valuable sewing tips! I’m going to assume that most of the people who purchase my tutorials know how to or will figure out how to turn on their machines and thread a needle, so I will begin with a straight seam and finishing. If you have any questions or suggestions, feel free to comment below.


Now, remember seam allowances may vary; I always use 3/8”. So, you will begin by placing two pieces of fabric, right sides together and running a straight stitch 3/8” inside of the edge. I like to run my straight stitches at a stitch length or three. Play with your lengths until you find one you prefer; usually, somewhere between 2.5 and 3.5.I will cover two finishing methods, but keep in mind, there are several more. These are simply simple.


Pinking
After you have sewn your straight stitch, you will use pinking shears and trim the edge of the fabric just outside of the seam.


ZigZag
Once you have sewn your straight stitch, run a narrow and short zigzag stitch along the raw edge, just outside of your straight stitch.


You may or may not choose to sew these seams down with a top stitch. Many regular machines also have an overcast stitch that will secure the edges of your fabric, much like the zigzag. It does a great job of finishing the raw edge, but it can be slow and may use more thread. The symbol looks something like these, but consult your machine manual.


Tuesday, May 31, 2011

The Right Stuff…or What Works for Me!


This is part one of many blog entries containing valuable sewing tips! I will be teaching a couple of sewing classes this summer at the Quilter’s Market in Tucson, Arizona and thought I should share the basics with my wonderful customers as well! I know many of you are learning to sew and I’m hoping that this will all be helpful in some way, to someone. I also know that many of you are seasoned and I would sincerely appreciate any input, suggestions or advice! Simply leave a comment below. If anyone has a question they would like answered, let me know and I will do my best to provide a logical response!


I know the internet contains an enormous amount of information, but I get tired of paging through it all. So, I recommend the following book because it has all the basic information you’re likely to need when sewing clothing, it’s accurate and all in one place; The Dressmakers Technique Bible by Lorna Knight. I was lucky enough to receive it as a gift, thanks Mandy, lobes you!


Included in this post are some photos of the stuff I typically use. Most of it is very helpful to have from the beginning, but not always necessary. I am an advocate for saving money, too. So, plan ahead and save up those coupons! Make it your personal goal to never pay retail. I love Joann’s fabric, but I always use coupons. I also shop at Fabric.com all too regularly. Always do a quick Internet search for their coupons because they always have something going on. Of course there is always Amazon.com. For your machine(s) I strongly suggest that you look at a sew and vac shop! They will answer all of your questions and let you try out the machines. They might have something in your budget, they typically offer trade in values and classes. All of this will help you avoid those lemons you’ll find in big box stores.


So here we go…


Cutting tools:
Sharp scissor, use them for nothing but fabric and thread, NOTHING BUT! Pinking shears, a seam ripper (unfortunately you’ll need this) and a rotary cutter which makes cutting go quickly. Be careful you don’t cut off any body parts with this!


Measuring tools:
A tape measure, you might want one with metric on one side and “standard” on the other. Be sure it is at least 60” long. If you use a rotary cutter you’ll need a self healing mat. My favorite is the 24”x36”. Also, a larger acrylic cutting square; I use Omnigrid. The size I use most is 14”x14”.


Threads:
You’ll need regular machine sewing thread that coordinates with your fabric. Also, upholstery or clear thread for easier gathering. Maybe some elastic thread for shirring. Overlocking or serger thread spools if you have a serger.


Pins and Needles:
Machine needles, dress making pins (straight pins), hand sewing needles and safety pins. It's up-side-down but blogger is going to make me crazy if I reload it againa...


Odds and ends:
Fray check for ribbons and a fabric pencil for marking on your fabric.


Machines:
A regular sewing machine, a serger and an iron and board.


Now, remember you may not need all of these things, these are just the tools I use often enough to mention. Feel free to comment if I left something out that you typically use or find helpful!

Wednesday, May 4, 2011

Sew Super Easy Summer Sun Hat!

Okay, here’s a free tutorial for all of you ladies out there who have little heads to protect from the hot summer sun. I didn’t have much time to get creative with this but you really could do so much more. This tutorial maybe used to create items for personal use and for sale. This tutorial may not be sold, it is FREE and to remain FREE. So, off we go and I can’t wait to see what everyone comes up with!

What you need:
No more than 20" x 20" of fabric
Elastic thread
Coordinating thread
Cutting and measuring tools

Some nice things to have:
A rolled hem foot or a serger that rolls hems
Cute embellishments like lace, ribbon, flowers etc…
Fabric marker


Cutting your fabric:
Doll: 13” x 13”
Newborn: 15” x 15”
3-6 months: 16” x 16”
6-12 months: 17” x 17”
Toddler: 18” x 18”
Child: 19” x 19”
Teen to Adult (hey, you never know): 20” x 20”

Let’s get started!


1) Now that you have your fabric cut to size, you will fold it twice.
• Fold your fabric in half. Yup, in half. It looks like a rectangle.
• Fold your fabric once more, so it looks like a square again.


2)Let’s make a circle!
• Place your fabric so that the single fold is to your left, the double fold
is at the top, and the raw edges are to the bottom and right.
• Now, draw and or cut and arc from the bottom left corner up to the top
right corner.
• Unfold your circle!


3) Now, you will hem the edge of your circle.
• I strongly encourage you to roll this hem, but if you do not have a rolled
hem foot or a serger, it’s okay!
• Fold the edge under ¼”, with the wrong sides of the fabric touching, and iron.
• Fold the edge under another ¼” and iron.
• Stitch this pressed hem into place. Making a few shallow 1/8” slits along the edge may help when folding your edge.


4) Next, you will shirr, or shape the hat! Gather an empty bobbin and your elastic thread.
• Hand spool the elastic thread onto your bobbin. Be sure you go the
same direction that your machine does when it spools the bobbin
automatically. Also,take care not to stretch the thread.

• Load the bobbin into your machine as you normally would.
• Set your straight stitch length to its longest setting.
• Starting 2” in from the edge with the right side of the fabric facing
upward and sew a continuous stitch around the hat.

• Make certain you backstitch several times at the beginning and end of
your shirring stitches. Also, do not pull your fabric through the feed.
You don’t want to stretch the elastic thread.
• Add another stitch about ¼” inside the first stitch and then another ¼”
inside the last.
• Place your hat on the ironing board and hold your iron over the elastic,
not touching, and blow steam. This will make it shrink up, giving you
more ruffle and stretch. This will also happen in the dryer, the first
time you launder.


5) Finally you can embellish your hat with whatever you can think of.


******CONTEST CONTEST CONTEST******


Now that you have the know how, I’d like to encourage your creativity. I’m going to ask you to make an adorable hat and share it with me. I will then feature your custom creation on the Tenderfeet Stitches Facebook page and let the fans vote for their favorite.

Up for Grabs!
The #1 fan favorite will receive any three tutorials from my Etsy shop.
The #2 fan favorite will receive any two tutorials from my Etsy shop.
The #3 fan favorite will receive any one tutorial from my Etsy shop.

All entries must be sent to Tenderfeetstitches@gmail.com by May 20, 2011 and they must be titled “Summer Sun Hat Contest Entry” Voting will begin on May 23, 2011 and will end on May 31, 2011.

Friday, April 22, 2011

Operation Leukemia Elimination – Battle Gabriel

Recently, I reached out to my fans on Facebook and asked several of them to help me test one of my patterns. It has been a stressful, yet very rewarding, experience. I have met some wonderfully helpful and patient ladies. I've also met a few that were not so kind, which only made me appreciate the finer qualities of these great women even more. Among these talented gals I met someone who really touched my heart. You can find her blog here.


If you don't already know, I am a mother to a toddler girl and an infant son. They are my life. I would give anything for them. No matter what the mountain, I would climb it as well as I could, in order to give them life and help them find happiness. Of course, any mother knows there are challenges; there are days when things seem overwhelming and out of your control. You simply need someone to reach out to you, lift you up and give you a hand. I want to help the Fairbank family in their battle for their son Gabriel, but I need your help too.


I will be holding an auction on Facebook. The item up for grabs is a handmade bubble dress in size 12 months. I'll let the dress speak for itself. Bidding will open at $10 and will close on Sunday, May 1st 2011 at 9pm EST. The highest bidder will win the dress and their entire bid will be donated to help Gabriel and his family.

If you would like to donate you may do so here. Otherwise, let the bidding begin.