Search This Blog

Friday, November 4, 2011

So You Think You Can Sew

A friend told me about this contest and I thought it was a great idea! So, I am going to enter my favorite creation, the Belle of the Ball Gown. I mean I couldn't help but notice that one of the prizes for first place was $100 to The Fat Quater Shop followed by Fabric Shoppe and Raspberry Creek Fabrics. If you know me, you know I love fabric, it's the reason I sew. The rest of the prizes are PDF style tutorials from some well known designers. I am sure many of you would also be thrilled to win these prizes. So, I'd like to encourage you to enter! If you enter something you've made using one of my tutorials, I will give you any one tutorial of your choice designed by Tenderfeet Stitches. If you make it to the top 12, I will give you any 10 tutorials of your choice designed by TFS.
I have seen so many beautiful creations from all of you that I encourage you to share them, to enter and to show off your sewing skills!


Please note that Mommybydaycrafterbynight is the host of So You Think You can Sew. My contest, contained with in this blog post, is not associated with her or her contest. I am simply promoting So You Think You Can Sew and encouraging my readers to enter using my own PDF patterns. Mommybydaycrafterbynight is not responsible for my contest, just as I am not responsible for hers.

Monday, October 17, 2011

Monthly Giveaway

I’m going to borrow an idea from one of my favorite people, Jaimie from Because of Leah. I love hearing from the people who purchase and use my tutorials. I especially love seeing what you create. So starting now, every month I will give away one TFS tutorial to a lucky person. All you have to do to enter is comment, post or like something on Tenderfeet Stitches Facebook wall or BLOG. Obviously, the more times you communicate with me the higher your odds of winning. I will randomly select a winner each month and that winner can select any tutorial in my Etsy shop free of charge. I look forward to hearing from ALL of you! p.s...the Malibu Mega Ruffle Dress could be yours for free, it debuts by the end of the month!

Sunday, October 9, 2011

Make me Petti Please

It’s a proven fact, pettiskirts make people happy, they make people smile. Every girl needs one, whether young or old. So, if you’d rather make one than buy one, you may find the included information and links very helpful. The most basic things required are:
Time
Patience
Other than those two essential things, Martha Steward and Kandi Lightner of Kaiya Eve Couture do a fabulous job showing us how to make the world a little bit fluffier. When selecting your chiffon, you need to obtain nylon chiffon, as it does not fray when cut. I suggest purchasing it in rolls to eliminate hours upon hours of cutting strip after strip. You can find these rolls here. I have never purchased from this company, but this is what you are looking for.
Be sure you watch the video on the left hand side of Martha’s page. If you have any questions about shirring, please visit this page and watch the video as well. I have also known people to use regular gathering techniques or a ruffling foot. So, shirring is not the only way to gather for this skirt.
Good luck and have fun with it. If not, go buy one! If you're looking for some thing beautiful to compliment your new petti, visit my shop and take a look at my princess dress patterns.

Thursday, September 22, 2011

Who's Behind TFS?

Considering I have had the privilege of meeting so many people through Tenderfeet Stitches, I thought I should share more about myself. I am Amanda, the motivation behind TFS. My love for sewing began when I was just a child and my mother made me the perfect little 80's play outfit with what I dubbed an "air conditioning" built in. It had this atrociously cute feature of knotted bows adorning the back. I was so proud to wear that get-up and explain to everyone, whether they asked or not, the true function of the open back design. At this young age I wasn't allowed to use her Phaff machine or the antique Singer with it's big wheel and peddle, but I was intrigued by how they worked and how they helped her make such lovable things. I took up a needle and thread and would go to work on scraps of fabric with shoddy embroidery work. After high school, I joined the United States Air Force and one of my first larger purchases was a sewing machine and enough fabric to look like a hoarder. I didn't even own a cell phone or a computer yet. I went to work on a quilt I never finished, but many more successful projects followed. After marriage, came our baby girl. When she was born I took up sewing children's clothing. I wasn't very good at it because I am a bit stubborn and prefer to learn things the hard way. Within a few years I had it down to my own science and was on the hunt for better patterns. When I couldn't find what I was looking for I began the journey of designing my own. It has been a thrilling journey, one in which, I have met some amazing people. I opened Tenderfeet Stitches on Etsy as soon as I discovered the existence of such a fabulous DIYer's haven. Since then, I have started teaching classes at a local fabric store, The Quilter's Market. I really love sharing that feeling I get when I successfully complete a garment. I can only hope that my children will discover the same joy and love within the things I create and that I can pass on the tools to others so that they may share such feelings with those they love.
Aside from sewing, I am a dedicated wife of many years and a mother of two. I have been blessed with both a daughter and a son who fill my days with only the joys young child can deliver. I work full time as a circuit board repair technician on avionics equipment and a repair supervisor. I am proud to have served my country through military service and be a veteran of foreign wars. My hobbies beyond sewing include anything outdoors, camping, quad-riding, cooking, baking, crocheting and reading a good book...and you likely won't find we anywhere without my iPhone, unless I'm camping in the middle of no where, Arizona.

Thursday, August 25, 2011

Belle of the Ball Gown Prerelease PARTY!


Do you want to win $50 worth of Tenderfeet Stitches tutorials? I'm changing it up a little...you could win a $50 gift certificate for use in my Etsy shop! One lucky person will win! Here’s how to enter...


Find a photograph of a garment you have made using one of my tutorials.


Post this photo on my Tenderfeet Stitches Facebook wall and say which tutorial you used.


Share the photo with all of your friends and family to get as many “Likes” as possible.

Don't forget to ask your likers to like my page as well!


The person who posted the photo that obtains the most “Likes” will receive the tutorial prize pack. I will close the contest at 11:59 pm EST Monday, 5 September 2011. This contest is in no way associated with or the responsibility of Facebook or Etsy. Any and all questions and concerns should be directed to Amanda at TenderfeetStitches@gmail.com.
Any entries that are not made from a tutorial purchased through my Etsy store by the poster will be disqualified. Comments on the photograph do not count toward the total of “Likes.” The only number I will use to determine the winner is the number of people who have “liked” the photograph via Facebook. The gift certificate is not valid for use on sale packs, only full price tutorials.

Wednesday, August 17, 2011

It’s a Cinch!

One of my favorite tutorials is the Mommy and Me Twirl Skirt. Not only is it amazingly simple and FAST, it also gives you the tools you need to make a one of a kind skirt in a zillion different sizes, lengths and layers. Okay, maybe not a zillion but I bet if we did the math it would be close enough to round. When I make the twirl skirt with a second layer (or more), I like to pinch up the top layer and tack it into place with a couple stitches or with a pin. Then, I attach a fun accessory and voila I have a cute little peek a boo skirt. Lately, I have noticed the use of another technique which seems to be gaining popularity. I prefer the simple pinch and stitch myself, but since I’m in the how-to business I’ll do my job! I haven’t a clue what this is called but here it is…


Here’s what you’ll need:
Your finished skirt
A length of about 1 ½” satin ribbon (suggested)
A length of ¼”- ½” ribbon (suggested)
A small sized safety pin
Your sewing machine
Scissors
Fray check

A few tips!

I am using a piece of fabric with a hemmed bottom edge and a red waistband along the top. This is only an example for the tutorial, you will be adding this to your skirt or whatever else interests you. For the ribbon, I prefer satin because it is light, yet durable and soft. You may use any type or ribbon of various widths. The length of your 1 1/2" ribbon will be and 1" shorter than the length of your skirt panel. The length of your 1/4"-1/2" tie ribbon will be about 4 times the length of your skirt panel. You can be the judge of the exact length once you have completed the process.


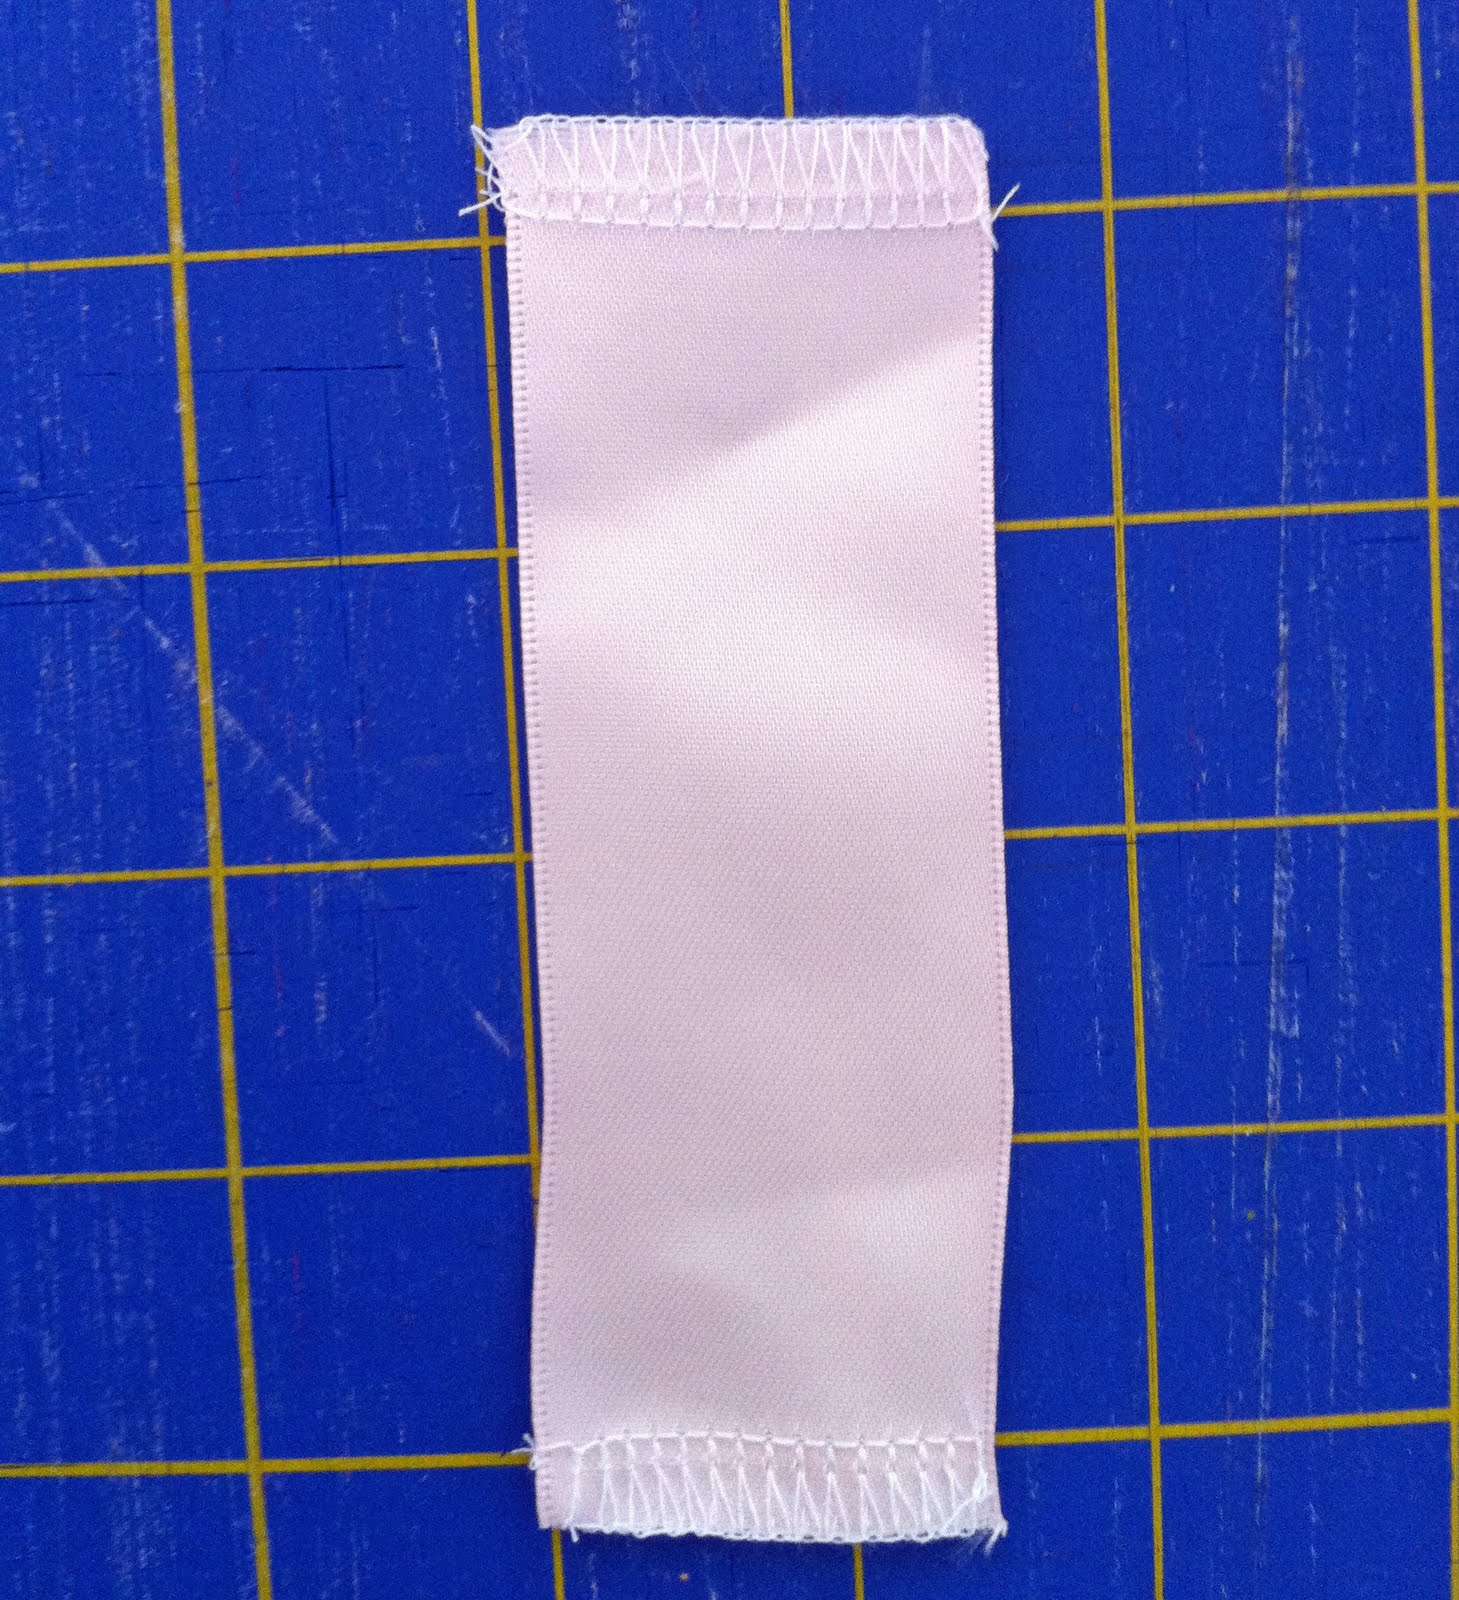
Begin by cutting your wider ribbon 1" shorter than the length of your skirt and finish the raw edges with a serger or an overcasting/overlocking stitch.


Next, place your wide ribbon onto the back side of your skirt panel with one of the finished ends just inside or above the hem line. Make sure your ribbon is pinned into place, laying flat and straight. Sew up both sides, about 1/4" in from each edge of the ribbon and then sew down the center of the ribbon. You have three stitches (red lines) running down the length of your ribbon, creating two tubes that are open at both ends.


This is optional, but you may add a small loop to the underside of your skirt to use for anchoring the tie ribbon. This comes in handy if you don't want the tie ribbon to show on the outside of the garment. Simply clip off a short piece of the small ribbon and fold it into a loop. Finish the raw ends and then attach it to the underside of your skirt along one of your previous stitch lines. I used about 1" of the smaller ribbon and attached it about 1" up from the hem line.


Clip the safety pin to one end of your smaller tie ribbon. Insert the safety pin into the bottom opening of one of your tubes. Work the safety pin up and out the top of the first tube. Then into the top of the second tube and down and out the bottom.


Tug on your tie ribbon until both sides are of equal length. Slide the skirt up so that it gathers to the length you'd prefer. Tie the ribbon into a bow or attach it to the loop on the underside of your skirt.


Voila! You have a peek a boo skirt!

Saturday, August 6, 2011

I can't say it enough...Thank You!

Tenderfeet Stitches has brought with it the opportunity to meet many people. Some of them make me laugh and smile while a small few simply make me wrinkle my brow. I have made friends that support and encourage me and I feel very blessed to have them all in my life. Many of the people I have met are amazingly talented, helpful, kind, encouraging, honest and inspiring. Their support keeps me going through my most difficult days and pushes me onward when I’d rather just wedge myself behind the washing machine with that shamefully unfinished pettiskirt my daughter has already outgrown. At the end of the day, I take a moment and I acknowledge where I am, how I’ve gotten there and who has helped me along my way. I think of my family, friends, customers, editor, accountant, testers and photographer. Yesterday was a big day for me, as I checked my inbox I found the gold at the end of the rainbow. Way better than the cutest leprechaun in make-believe land adorn in Tenderfeet Stitches attire, I discovered the sparkling awe of Erica Finnan and her astounding talent. Every single time I see her photographs I think she has hit her summit until I see the next one and realize her talent will only continue to soar. She is a kind and extremely talented woman and I am truly grateful to share my journey with her. She makes my designs shine in a way I could never and her little models are adorably angelic. Thank you so much Erica, for another round of fantastic photographs and for all the effort you put into making them beautiful. Thank you to everyone who has and continues to support me along my little journey.